American Sandwich Bread
Please note that we have since shared what we consider to be a standby, most foolproof white bread recipe. We encourage you to head over to that recipe and give it a try!
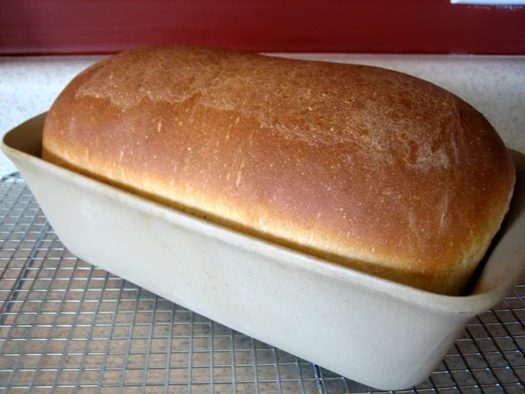
Otherwise known as, white bread. We know, you’re probably wondering to yourself, isn’t this the umpteenth “classic white bread” recipe this chick has posted? Well yes, admittedly, we think this is now the third different loaf that we have blogged (there was the Better Homes & Garden version, then the Peter Reinhart recipe, and now this). It’s not that any of the previous loaves have been bad or have disappointed us in any way. It’s quite simply that I.LOVE.BREAD. We don’t come from the land of low carb, folks. And given the opportunity to try a new recipe when we need to restock the kitchen with a fresh loaf of bread, we run with it! And this loaf, let us tell you, is definitely worth running for!
One of the things we loved about this recipe is how speedy it was to execute. Many people are intimidated by from-scratch bread, not only because of yeast, but also because of the time factor. Some believe that it will take the better part of a day to churn out a loaf of from-scratch bread. That’s just not true. Now granted there are recipes for complex loaves of bread that include sponges, starters, and three rises that can take a day or more, but for your basic loaf of white bread, just not so. Two hours after you start the process you can be pulling a loaf of fresh bread out of your oven.
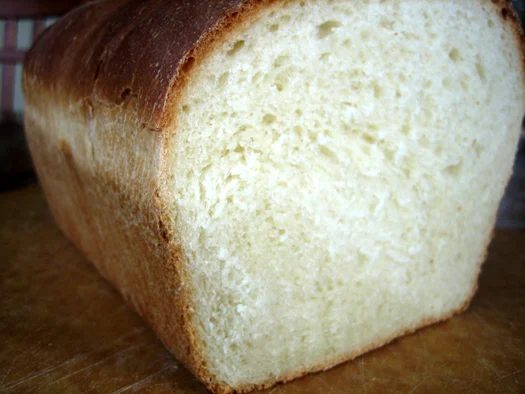
Another thing we love about this particular recipe is that you get a high loaf of bread, which isn’t always the case when making a regular white bread. We have had our fair share of smallish loaves, and this one definitely turns in a nice change of pace. The key here it to let it go on its second rise until the dough is about an inch higher than the rim of the loaf pan. Then once in the oven, the loaf will gain even more height.
This round of bread making was not without incident, and there was almost a casualty. Now as any KA owner can attest, one of the beautiful things about these wonderful appliances is that you can throw in your ingredients and let it work while you tend to other things, such as cleaning up your mess. We do this often when creaming butter and sugar, and kneading bread dough. Both things take at least a few minutes, so we use the idle time to our advantage. Until today. Our dough was kneading away on our island and we were putting our dirty utensils in the dishwasher when we heard the KA start to do a thump, which is not unusual when kneading. But then, 2 seconds later, it did a nose dive onto the floor! Luckily the little KA that could is just fine, the floor is fine, catastrophe averted. We have to wonder if perhaps our KA heard us talking behind its back about how we wish it would die so we could upgrade to a Professional 600 and figured it would help us by leaping to its suicidal death?
Regardless, we all survived the incident to bring you this wonderful bread recipe!
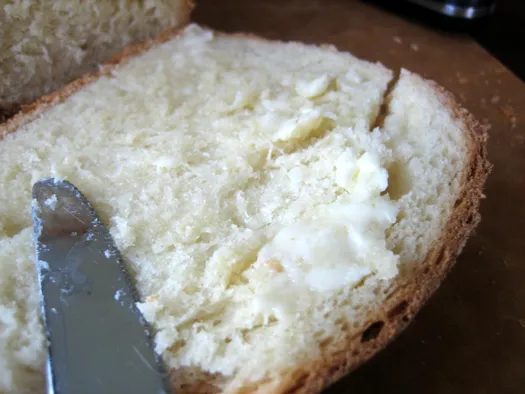
Quite possibly our favorite way to eat bread – slathered with butter. When we were younger, our grandma often quipped that we were the only person she knew who could make a meal from bread and butter. Not much has changed ;-)
- Yield: 9 servings (One 9-inch loaf)
- Prep: 1 hour 45 minutes
- Cook: 45 minutes
- Total: 2 hours 30 minutes
Ingredients
- 3¾ cups ( 468.75 g ) unbleached all-purpose flour, plus more for dusting the work surface, (18¾ ounces)
- 2 teaspoons salt
- 1 cup ( 244 ml ) warm whole milk, about 110 degrees
- ⅓ cup ( 83.33 ml ) warm water, about 110 degrees
- 2 tablespoons unsalted butter, melted
- 3 tablespoons honey
- 1 envelope instant yeast, (about 2¼ teaspoons)
Method
- 1. Adjust an oven rack to the lowest position and heat the oven to 200 degrees. Once the oven temperature reaches 200 degrees, maintain the heat for 10 minutes, then turn off the oven.
- 2. Mix 3½ cups of the flour and the salt in the bowl of a standing mixer fitted with the dough hook. Mix the milk, water, butter, honey, and yeast in a 4-cup liquid measuring cup. Turn the machine to low and slowly add the liquid. When the dough comes together, increase the speed to medium and mix until the dough is smooth and satiny, stopping the machine two or three times to scrape dough from hook, if necessary, about 10 minutes. (After 5 minutes of kneading, if the dough is still sticking to the sides of the bowl, add flour, 1 tablespoon at a time and up to ¼ cup total, until the dough is no longer sticky.) Turn the dough onto a lightly floured work surface; knead to form a smooth, round ball, about 15 seconds.
- 3. Place the dough in a lightly oiled large bowl, rubbing the dough around the bowl to coat lightly. Cover the bowl with plastic wrap and place in the warmed oven until the dough doubles in size, 40 to 50 minutes.
- 4. Gently press the dough into a rectangle 1 inch thick and no longer than 9 inches. WIth a long side facing you, roll the dough firmly into a cylinder, pressing with your fingers to make sure the dough sticks to itself. Turn the dough seam-side up and pinch it closed. Place the dough seam-side down in a greased 9 by 5-inch loaf pan and press it gently so it touches all four sides of the pan. Cover with plastic wrap; set aside in a warm spot until the dough almost doubles in size, 20 to 30 minutes.
- 5. Keep one oven rack at the lowest position and place the other at the middle position and heat the oven to 350 degrees. Place an empty baking pan on the bottom rack. Bring 2 cups of water to a boil in a small saucepan. Pour the boiling water into the empty pan on the bottom rack at set the loaf onto the middle rack. Bake until an instant-read thermometer inserted at an angle from the short end just above the pan rim into the center of the loaf read 195 degrees, 40 to 50 minutes. Remove the bread from the pan, transfer to a wire rack, and cool to room temperature. Slice and serve.
- Note: This recipe uses a standing electric mixer. You can hand-knead the dough, but we found it’s straightforward to add too much flour during this stage, resulting in a somewhat tougher loaf. To promote a crisp crust,we found it best to place a loaf pan filled with boiling water in the oven as the bread bakes.