Choco-Bliss Snack Cakes
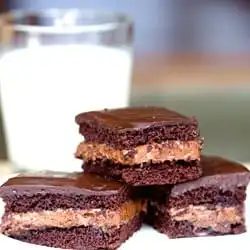
Raise your hand if you remember the Hostess Choco-Bliss snack cakes from the glory days of the ’80s. These were one of the many “junk foods” that were seen few and far between at our house. We could probably count on one hand (maaaaaybe two) how many times we actually ingested a Twinkie, Ding Dong, Hostess Cupcake, Fruit Pie or any snack cakes during our entire childhood. They were always so tempting in the checkout line, but were usually off-limits. We didn’t even know the glory that was Little Debbie until we were in high school! Our high school somehow managed its class schedule so that every single Friday was a half day. Don’t ask us how it was done – it was a small, Catholic high school – but, suffice it to say, everyone was pretty happy with that arrangement. For four whole years, we never had school past 12:20pm on a Friday. Upperclassmen (juniors and seniors) were dismissed at 11:20 and freshmen and sophomores at 12:20. It was a tradition for the junior class to raise money for the prom by selling snacks and pop to the underclassmen to eat during their final period on Fridays. This is where we discovered the land of snack cakes, and there was no going back! Little Debbie managed to undo all of our mom’s previous 14 years of discipline. Oops! When we saw a recreation of the Choco-Bliss snack cakes – plush, chocolate cakes with a fluffy chocolate filling and rich chocolate icing – on King Arthur Flour’s website, we had to bake them up. Immediately.
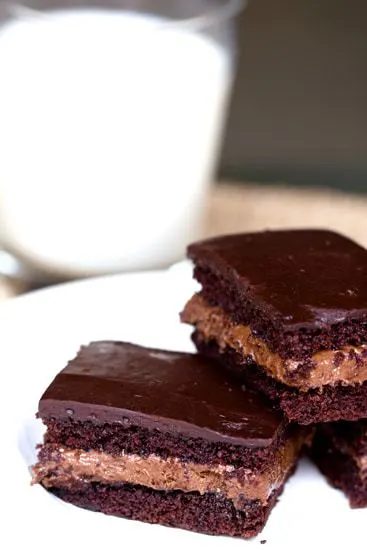
These little babies are some of the most memorable chocolate treats that we have ever baked up. The chocolate cake is so incredibly plush and the filling is totally irresistible. It’s fluffy, sweet and incredibly chocolate-y. We couldn’t help taking taste after taste while we were assembling the cakes. It took so many tastes, in fact, that we totally ruined our dinner that day. No matter, it was absolutely worth it. On top of the filled chocolate cakes is a rich chocolate icing that sets firm and completes the snack cake recreation. No snack cake was complete without that fudgy icing on top, right?!
These are cut into snack cake-size portions, but there are two important things you should know: (1) With all of that chocolate, you’ll definitely want to eat these with a glass of milk; and (2) we have an extremely hard time eating just one at a time. Needless to say, we absolutely loved these chocolate snack cakes – they were a reliable replication of the original, and they brought back fun memories of high school and carefree Friday afternoons. We love when food can trigger memories!
One year ago: From-scratch Primanti Bros. Sandwich
Two years ago: Savory Corn and Pepper Muffins
Three years ago: Ultimate Ginger Cookies
From-scratch Choco-Bliss Snack Cakes
Yield: 18 snack cakes Reliable chocolate cakes when you need a snack!For the Cake:
- 1 cup (227 g) unsalted butter
- ⅓ cup (28.67 g) Dutch-process cocoa powder
- 1 cup (250 ml) hot water
- 2 cups (250 g) all-purpose flour
- 1 teaspoon espresso powder
- 2 cups (400 g) granulated sugar
- 1 teaspoon baking soda
- ½ teaspoon (0.5 teaspoon) salt
- ½ cup (120 ml) buttermilk
- 2 eggs
- 1 teaspoon vanilla extract
For the Filling:
- ⅓ cup (28.67 g) Dutch-process cocoa powder, sifted
- ½ cup (90 g) semisweet chocolate chips
- ¼ teaspoon (0.25 teaspoon) salt
- ½ cup (119 ml) heavy cream
- 1 teaspoon vanilla extract
- ¼ cup (56.75 g) unsalted butter, at room temperature
- ½ cup (102.5 g) vegetable shortening, at room temperature
- 4 cups (480 g) powdered sugar, sifted
For the Icing:
- 1 cup (180 g) semisweet chocolate chips
- 1 tablespoon light corn syrup
- ½ teaspoon (0.5 teaspoon) vanilla extract
- ⅓ cup (79.33 ml) heavy cream
- ¾ cup (90 g) powdered sugar, sifted
- 1. Preheat oven to 350 degrees F. Line a 9x13-inch pan with parchment, then grease and flour the pan; set aside.
- 2. Make the Cake: In a small bowl, melt the butter, then stir in the cocoa powder and hot water until the cocoa is completely dissolved; set aside.
- 3. In a large bowl, whisk together the flour, espresso powder, sugar, baking soda and salt; set aside. Pour the cocoa mixture over the dry ingredients, stirring to blend completely. Add the buttermilk, eggs and vanilla, and stir with a rubber spatula until completely combined.
- 4. Pour the batter into the prepared pan. Bake for 30 minutes, or until a toothpick inserted in the center comes out clean and the cake begins to pull away from the edges of the pan. Remove from the oven and cool completely on a wire cooling rack.
- 5. Make the Filling: Place the cocoa powder, chocolate chips, salt and heavy cream in a microwave-safe bowl. Microwave until the cream is hot, and the chips have softened, about 1 minutes. Remove from the microwave and stir until the chips are melted and the mixture is smooth, microwaving again briefly if necessary. Stir in the vanilla and set aside.
- 6. In a large bowl, beat together the butter, shortening and half of the powdered sugar on medium speed until fluffy, about 3 to 5 minutes. Add the chocolate mixture and continue beating until smooth. Scrap the sides of the bowl and add the remaining 2 cups powdered sugar. Beat again until the filling is fluffy.
- 7. Assemble the Cakes: Turn the cooled cake out of the pan and cut it in half crosswise, to make two 9"x6.5" rectangles. using a long serrated knife, slice through the middle of each rectangle to make two halves (a top and a bottom).
- 8. Spread half of the filling on one bottom piece to the edge of the cake. Repeat with the other bottom piece. Top the bottom pieces with the top pieces. You should now have two chocolate-filled 9"x6.5" cakes.
- 9. Make the Icing: Combine the chocolate chips, corn syrup vanilla and heavy cream in a microwave-safe bowl. Microwave until the cream is hot, and the chips have softened, about 1 minute. Stir till the chips have melted and the mixture is smooth, microwaving again briefly if necessary. Add the powdered sugar and beat on medium speed until smooth.
- 10. Spread the icing evenly over the two cakes. Working with one cake at a time, slice into nine 2x3-inch snack cakes. Repeat with the remaining cake for 18 total snack cakes.
- Store the cakes at room temperature in an airtight container (you can wrap them individually in plastic wrap to keep them extra-fresh) for up to 3 days.
Notes
Nutritional values are based on one serving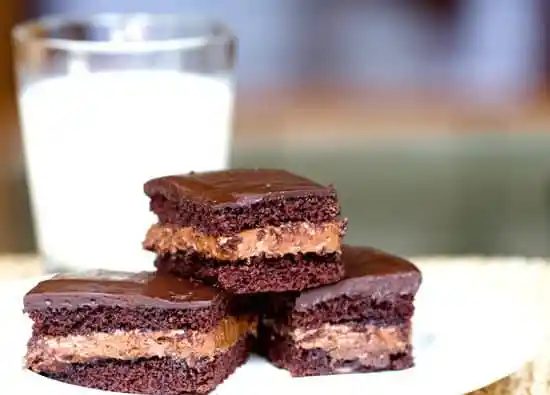
- Yield: 18 snack cakes
- Prep: 45 minutes
- Cook: 30 minutes
- Total: 1 hour 15 minutes
Ingredients
For the Cake:
- 1 cup ( 227 g ) unsalted butter
- ⅓ cup ( 28.67 g ) Dutch-process cocoa powder
- 1 cup ( 250 ml ) hot water
- 2 cups ( 250 g ) all-purpose flour
- 1 teaspoon espresso powder
- 2 cups ( 400 g ) granulated sugar
- 1 teaspoon baking soda
- ½ teaspoon ( 0.5 teaspoon ) salt
- ½ cup ( 120 ml ) buttermilk
- 2 eggs
- 1 teaspoon vanilla extract
For the Filling:
- ⅓ cup ( 28.67 g ) Dutch-process cocoa powder, sifted
- ½ cup ( 90 g ) semisweet chocolate chips
- ¼ teaspoon ( 0.25 teaspoon ) salt
- ½ cup ( 119 ml ) heavy cream
- 1 teaspoon vanilla extract
- ¼ cup ( 56.75 g ) unsalted butter, at room temperature
- ½ cup ( 102.5 g ) vegetable shortening, at room temperature
- 4 cups ( 480 g ) powdered sugar, sifted
For the Icing:
- 1 cup ( 180 g ) semisweet chocolate chips
- 1 tablespoon light corn syrup
- ½ teaspoon ( 0.5 teaspoon ) vanilla extract
- ⅓ cup ( 79.33 ml ) heavy cream
- ¾ cup ( 90 g ) powdered sugar, sifted
Method
- 1. Preheat oven to 350 degrees F. Line a 9x13-inch pan with parchment, then grease and flour the pan; set aside.
- 2. Make the Cake: In a small bowl, melt the butter, then stir in the cocoa powder and hot water until the cocoa is completely dissolved; set aside.
- 3. In a large bowl, whisk together the flour, espresso powder, sugar, baking soda and salt; set aside. Pour the cocoa mixture over the dry ingredients, stirring to blend completely. Add the buttermilk, eggs and vanilla, and stir with a rubber spatula until completely combined.
- 4. Pour the batter into the prepared pan. Bake for 30 minutes, or until a toothpick inserted in the center comes out clean and the cake begins to pull away from the edges of the pan. Remove from the oven and cool completely on a wire cooling rack.
- 5. Make the Filling: Place the cocoa powder, chocolate chips, salt and heavy cream in a microwave-safe bowl. Microwave until the cream is hot, and the chips have softened, about 1 minutes. Remove from the microwave and stir until the chips are melted and the mixture is smooth, microwaving again briefly if necessary. Stir in the vanilla and set aside.
- 6. In a large bowl, beat together the butter, shortening and half of the powdered sugar on medium speed until fluffy, about 3 to 5 minutes. Add the chocolate mixture and continue beating until smooth. Scrap the sides of the bowl and add the remaining 2 cups powdered sugar. Beat again until the filling is fluffy.
- 7. Assemble the Cakes: Turn the cooled cake out of the pan and cut it in half crosswise, to make two 9"x6.5" rectangles. using a long serrated knife, slice through the middle of each rectangle to make two halves (a top and a bottom).
- 8. Spread half of the filling on one bottom piece to the edge of the cake. Repeat with the other bottom piece. Top the bottom pieces with the top pieces. You should now have two chocolate-filled 9"x6.5" cakes.
- 9. Make the Icing: Combine the chocolate chips, corn syrup vanilla and heavy cream in a microwave-safe bowl. Microwave until the cream is hot, and the chips have softened, about 1 minute. Stir till the chips have melted and the mixture is smooth, microwaving again briefly if necessary. Add the powdered sugar and beat on medium speed until smooth.
- 10. Spread the icing evenly over the two cakes. Working with one cake at a time, slice into nine 2x3-inch snack cakes. Repeat with the remaining cake for 18 total snack cakes.
- Store the cakes at room temperature in an airtight container (you can wrap them individually in plastic wrap to keep them extra-fresh) for up to 3 days.