Pita Bread
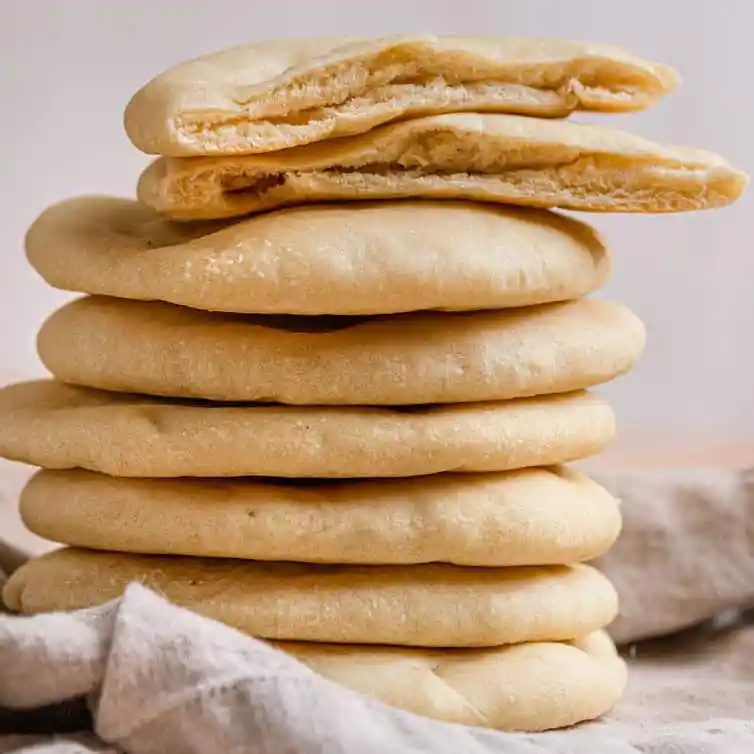
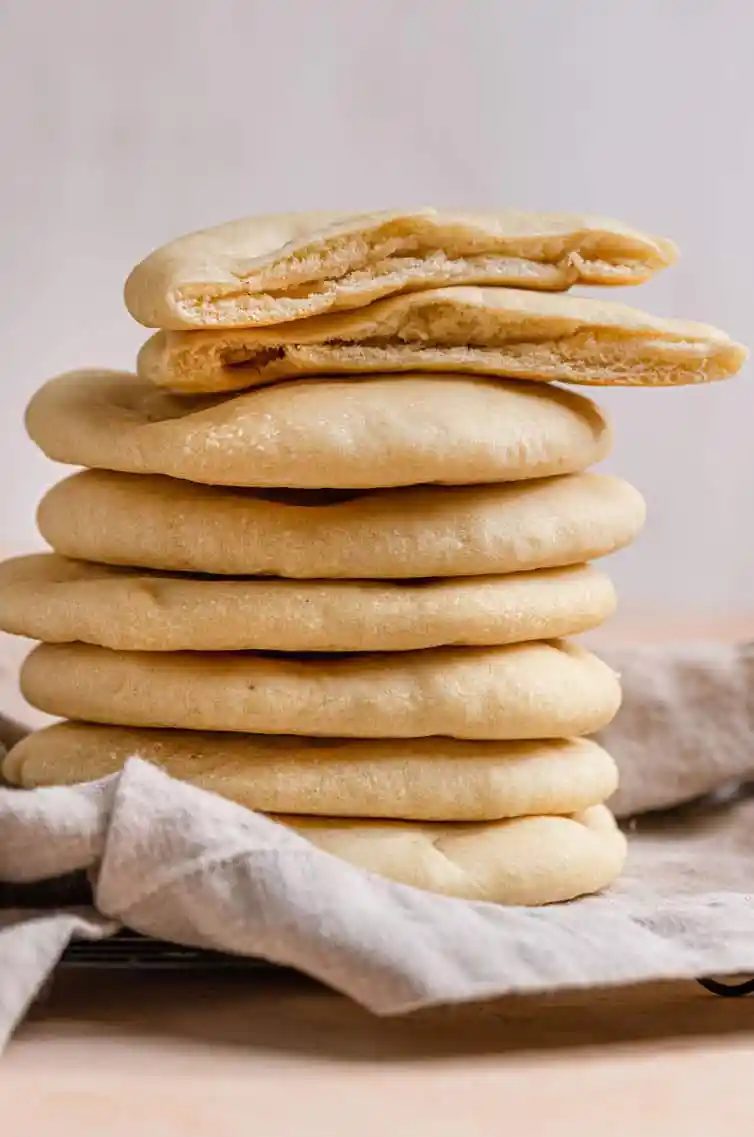
Learn how to make from-scratch pita bread with this simple recipe; we promise it’s easier than you think! So much better than store-bought, you can use your pita for sandwiches, gyros, dipping into hummus, making from-scratch pita chips… the possibilities are endless. We can’t wait for you to make these!
Growing up, our grandma always kept a stash of pita bread in her kitchen. She would sometimes stuff it with cucumber salad or tomato salad (always fresh from the garden!), but we most often remember her splitting them open, toasting them and slathering pb& j on them.
As an adult, we discovered true, traditional pita at Middle Eastern restaurants and fell head over heels in love. They were nothing like the store-bought stuff we ate growing up, and we couldn’t get enough of it, especially if we could dip it into authentic hummus.
Once we began tackling bread baking at home, pita was high on our list of recipes to try. We were surprised (and elated!) to discover just how straightforward making pita bread at home could be. You’ll never want to get store-bought again!
History and origin
Pita is a general term for a family of yeast-leavened flatbreads that are common in the Mediterranean and the Middle East. The type that we are making today, with an interior pocket, is known by the generic term “pita” in most places in the U.S. and is also known as Arabic bread or Syrian bread. There are also pocketless pita versions, such as the Greek pita, which is traditionally used as the wrap for gyros.
Pita bread goes wayyyy back to prehistoric times in the Middle East; we’re talking nearly 15,000 years ago! There is evidence from the Stone Age that flatbreads were made using wild grains. There isn’t any record of the puffed, pocketed pita until more recent times, so it’s more of a “modern” take on flatbreads.
Pita vs naan
They look similar, but they are actually quite different! Here’s the breakdown:
Pita Bread
- Originated in the Middle East
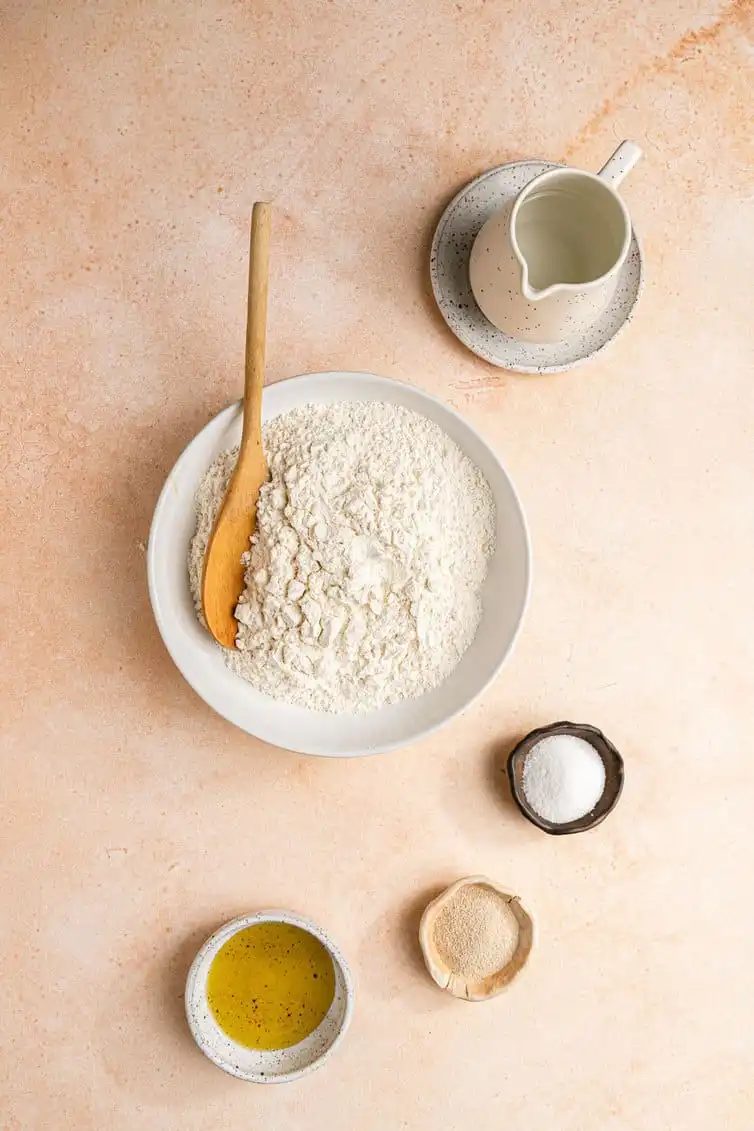
- Simple list of ingredients – flour, salt, water, yeast and sometimes a small amount of sweetener or fat
- Has a drier texture
- Pocketed
- Can be made in a modern oven
Naan
- Originated in India
- Ingredients usually include yogurt and milk, and sometimes eggs or butter
- Softer texture
- Pocketless, eaten flat as one piece
- Made in a tandoor (clay oven) or in a skillet (though this version is less desirable)
How to make it
It may look and sound intimidating, but it’s actually quite a simple process, let’s talk through it…
- Mix and Knead Dough – Just as all yeast-based recipes, the first step is to mix the dough and knead it until slightly tacky and supple.
- 1st Rise – Place the dough in a greased bowl, cover, and set aside until it has doubled in size (about 90 minutes).
- Shape Into Balls – Divide the dough into 8 pieces and roll into balls.
- Rest – Cover the balls of dough and let rest for 20 minutes so they relax and are easier to shape.
- Shape – Using a rolling pin or your hands, roll/stretch the dough into a 6-inch circle.
- 2nd Rise – Once all of the dough has been shaped into discs, cover them until nearly doubled in thickness, 30 to 45 minutes.
- Bake – Place the discs on a baking stone or cookie sheet in the preheated oven and bake until completely puffy, about 3 minutes.
Oven vs stovetop
While an oven is the easiest way to cook pita bread since you can make them all at once, you can also make it on the stovetop if you want/need to.
Simply place a large nonstick skillet over medium heat. Cook the pitas, one at a time, flipping it over after about 10 seconds. Once the bread is completely puffed and has some brown patches, it is done.
Baker notes
If you’re experiencing issues with pitas not puffing (ack, no pocket!), being difficult to roll out, or browning issues, read below for our key tips on making reliable pitas:
- Keep the dough tacky – You don’t want to add too much flour or the pita will be quite dry; this shouldn’t be an issue if kneading with a stand mixer; if you are kneading by hand, we recommend using a silicone scraper for hand-kneading softer doughs to avoid adding too much flour.
- Roll the dough THIN – You want to make sure the dough is NO MORE than ¼-inch thick (⅛-inch is even better!). If the dough is too thick, it won’t be able to puff up.
- Rest the dough if necessary – If the dough shrinks back or resists when you’re shaping the circles, cover it with a damp tea towel and let it rest for 5 or 10 minutes and then try again.
- The 2nd rise is key! – The second rise doesn’t take long (30 to 45 minutes), but you need to allow the dough to rise again for the pitas to cook correctly.
- Hot oven + preheated baking surface – Use an oven thermometer of necessary to make sure your oven is fully preheated to 450 degrees F and place either a baking stone (the standby surface!) or cookie sheet into the oven to heat up, as well. The pitas need that burst of hot air to do their puffing and the preheated surfaces will help get those brown spots.
- Wrap them up – Once the pitas are done baking, wrap them up in a kitchen towel while still warm. This helps them reabsorb some of the steam and keeps them softer longer.
What to eat with pita bread
- Stuff it with falafels, cucumber salad, chicken salad, egg salad, or your favorite sandwich fixings.
- Wrap up from-scratch gyros. While the traditional Greek pitas have no pocket, these will work in a pinch!
- Dip it into classic hummus or roasted red pepper hummus.
- Cut it up and make from-scratch pita chips. Season however you’d like!
- Toast it and slather with peanut butter and jelly – our grandma’s favorite way to eat it :)
If you make this recipe and love it, we would so appreciate it if you would take a moment to leave a rating below. Thank you so much! ❤️️
From-scratch Pita Bread
Yield: 8 pitas Learn how to make from-scratch pita bread with this simple recipe; we promise it's easier than you think! So much better than store-bought, you can use your pita for sandwiches, gyros, dipping into hummus... anything you'd like!- 3 cups (360 g) all-purpose flour
- 1½ teaspoons (1.5 teaspoons) salt
- 1 tablespoon sugar or honey
- 2¼ teaspoons (2.25) instant yeast
- 1¼ to 1½ cups (300 to 360 ml) water, room temperature
- 2 tablespoons olive oil, vegetable oil, melted butter, or shortening
- Make the Dough: In a large mixing bowl, whisk together the flour, salt, sugar, and yeast. Add 1¼ cups of the water water and the olive oil and stir together with a wooden spoon. All of the ingredients should form a ball. If some of the flour will not stick to the ball, add more water a small amount at a time.
- Once all of the ingredients form a ball, place the ball on a work surface and knead the dough for approximately 10 minutes, until slightly tacky and soft. If you are using an electric mixer, mix it at low speed for 10 minutes.
- 1st Rise: Place the kneaded dough into a greased bowl, turning to coat it. Cover the bowl with plastic wrap or a damp kitchen towel and set aside to rise until it has doubled in size, approximately 90 minutes.
- Roll Into Balls: When it has doubled in size, punch the dough down to release some of the trapped gases and divide it into 8 pieces. Roll each piece into a ball, then cover the balls with a damp kitchen towel, and let them rest for 20 minutes. This step allows the dough to relax so that it'll be easier to shape.
- Preheat the Oven: While the dough is resting, preheat the oven to 450 degrees. If you have a baking stone, put it in the oven to preheat as well. If you do not have a baking stone, turn a cookie sheet upside down and place it on the middle rack of the oven while you are preheating the oven. This will be the surface on which you bake your pitas.
- Shape the Pita: After the dough has relaxed for 20 minutes, spread a light coating of flour on a work surface and place one of the balls of dough there. Sprinkle a little bit of flour on top of the dough and use a rolling pin or your hands to stretch and flatten the dough. You should be able to roll it out to between 1/8 and 1/4 inch thick - 6 inches in diameter. If the dough does not stretch sufficiently you can cover it with the damp towel and let it rest 5 to 10 minutes before trying again.
- Place discs on a lightly greased baking sheet and let rise, uncovered, until barely doubled in thickness, about 30-45 minutes.
- Bake the Pitas: Open the oven and place as many pitas as you can fit on the hot baking surface. They should be baked through and puffy after 3 minutes. If you want your pitas to be crispy and brown you can bake them for an additional 3 to 5 minutes, but it isn't necessary. Wrap the baked pitas in a kitchen towel to help trap some of the steam and keep them soft.
Notes
- Sugar - You can substitute the same amount of honey for the sugar in the recipe.
- Olive Oil - You can substitute the same amount of vegetable oil, melted butter, or melted shortening.
- Equipment - Baking stone / Skillet / Rolling pin
- Make-Ahead - Once the dough has gone through its first rise, you can store the dough, tightly covered, in the refrigerator for up to 1 week.
- Storage - From-scratch pita is best eaten fresh, but it will keep in an airtight container at room temperature for up to 2 days. Reheat in the microwave, toaster oven, or skillet if desired.
- Freezing Instructions - Cool completely, then store in a freezer ziploc bag or another airtight container, placing a layer of wax paper between pitas to keep them from sticking. Freeze for up to 3 months. You can reheat from frozen.
- Recipe adapted from The Fresh Loaf and Culinary Infatuation
[Photography by Dee of One Sarcastic Baker]
- Yield: 8 pitas
- Prep: 2 hours 30 minutes
- Cook: 5 minutes
- Total: 2 hours 35 minutes
Ingredients
- 3 cups ( 360 g ) all-purpose flour
- 1½ teaspoons ( 1.5 teaspoons ) salt
- 1 tablespoon sugar or honey
- 2¼ teaspoons ( 2.25 ) instant yeast
- 1¼ to 1½ cups ( 300 to 360 ml ) water, room temperature
- 2 tablespoons olive oil, vegetable oil, melted butter, or shortening
Method
- Make the Dough: In a large mixing bowl, whisk together the flour, salt, sugar, and yeast. Add 1¼ cups of the water water and the olive oil and stir together with a wooden spoon. All of the ingredients should form a ball. If some of the flour will not stick to the ball, add more water a small amount at a time.
- Once all of the ingredients form a ball, place the ball on a work surface and knead the dough for approximately 10 minutes, until slightly tacky and soft. If you are using an electric mixer, mix it at low speed for 10 minutes.
- 1st Rise: Place the kneaded dough into a greased bowl, turning to coat it. Cover the bowl with plastic wrap or a damp kitchen towel and set aside to rise until it has doubled in size, approximately 90 minutes.
- Roll Into Balls: When it has doubled in size, punch the dough down to release some of the trapped gases and divide it into 8 pieces. Roll each piece into a ball, then cover the balls with a damp kitchen towel, and let them rest for 20 minutes. This step allows the dough to relax so that it'll be easier to shape.
- Preheat the Oven: While the dough is resting, preheat the oven to 450 degrees. If you have a baking stone, put it in the oven to preheat as well. If you do not have a baking stone, turn a cookie sheet upside down and place it on the middle rack of the oven while you are preheating the oven. This will be the surface on which you bake your pitas.
- Shape the Pita: After the dough has relaxed for 20 minutes, spread a light coating of flour on a work surface and place one of the balls of dough there. Sprinkle a little bit of flour on top of the dough and use a rolling pin or your hands to stretch and flatten the dough. You should be able to roll it out to between 1/8 and 1/4 inch thick - 6 inches in diameter. If the dough does not stretch sufficiently you can cover it with the damp towel and let it rest 5 to 10 minutes before trying again.
- Place discs on a lightly greased baking sheet and let rise, uncovered, until barely doubled in thickness, about 30-45 minutes.
- Bake the Pitas: Open the oven and place as many pitas as you can fit on the hot baking surface. They should be baked through and puffy after 3 minutes. If you want your pitas to be crispy and brown you can bake them for an additional 3 to 5 minutes, but it isn't necessary. Wrap the baked pitas in a kitchen towel to help trap some of the steam and keep them soft.
Notes
Sugar - You can substitute the same amount of honey for the sugar in the recipe.
Olive Oil - You can substitute the same amount of vegetable oil, melted butter, or melted shortening.
Equipment - Baking stone / Skillet / Rolling pin
Make-Ahead - Once the dough has gone through its first rise, you can store the dough, tightly covered, in the refrigerator for up to 1 week.
Storage - From-scratch pita is best eaten fresh, but it will keep in an airtight container at room temperature for up to 2 days. Reheat in the microwave, toaster oven, or skillet if desired.
Freezing Instructions - Cool completely, then store in a freezer ziploc bag or another airtight container, placing a layer of wax paper between pitas to keep them from sticking. Freeze for up to 3 months. You can reheat from frozen.
Recipe adapted from The Fresh Loaf and Culinary Infatuation
[Photography by Dee of One Sarcastic Baker ]


![Greek Easter Bread [Tsoureki]](/assets/media/greek-easter-bread-recipe-tsoureki.jpg)