Jewish Rye Bread
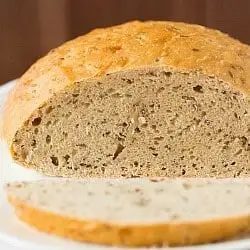
Yesterday, we walked you through how to make a rye sourdough starter, which means that today we talk about the actual bread! We don’t know about you, but for us, rye bread was absolutely an acquired taste. We remember being a kid and being totally befuddled by our great aunt’s fondness for rye bread. We didn’t quite share her affinity for the bread, and feel bad for any adult family member who had to deal with us if a stray caraway seed found its way into our mouth. The atrocity! You’d think that we had swallowed battery acid. (we were such a treat!)
It took us a long, long time to even want to try rye bread, and we were probably in our late twenties by the time we realized that we maybe, actually, sort of liked it. We're sure that corned beef, Swiss cheese and Thousand Island dressing piled onto rye bread went a long way in swaying us to try it again. Once we realized it was actually quite good, we set about making our own. As we mentioned yesterday, we hit quite a few stumbling blocks on our way to this recipe, but we're so elated to have finally conquered rye bread in our kitchen!
This version of sourdough rye bread is often referred to as “corn bread” because the word “corn” was used to describe any type of grain in Poland, Lithuania, Latvia and Russia, which are the areas where this bread originated. Can you believe that rye was first discovered in 500 A.D. and that dark rye bread was being eaten during the Middle Ages?! Talk about a classic!
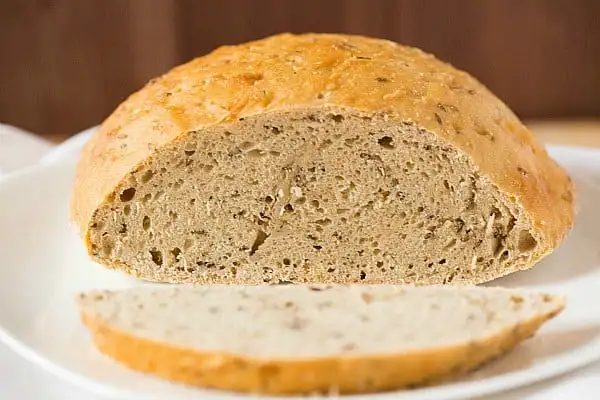
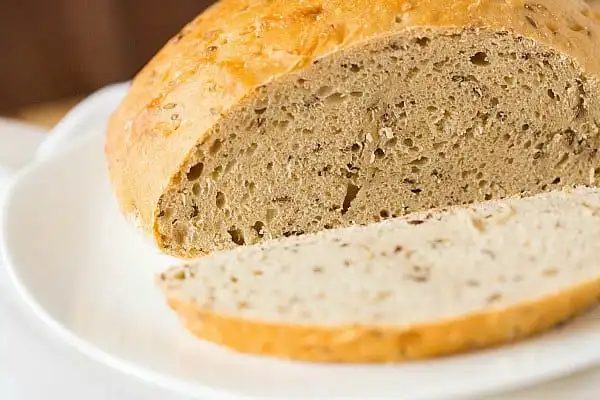
This style of bread isn’t as light and fluffy as most commercial loaves of sandwich bread. Rather, it’s quite heavy and dense, and what we would consider plush (the recipe refers to it as “damp”). This means that each slice is substantial, which bodes well for a lighter slathering of butter on your morning toast.
It also makes an absolutely fantastic reuben sandwich.
(we're a Pittsburgh girl, which means that we'll always opt for coleslaw instead of sauerkraut on our sandwiches. See: Primanti Bros.)
Kitchen projects like this are what keep our baking heart ticking. The trial, the error, and then, finally, the fabulous feeling of something turning out just right. It’s a fun, satisfying experience… plus, there’s nothing more rich than sweet kitchen success!
One year ago: New Orleans Beignets and Creole Shrimp and Grits
Two years ago: Blueberry Bagels
Three years ago: Oven-Fried Onion Rings with Dipping Sauce
Five years ago: Chicken and Dumplings
Jewish Rye Bread
Yield: 16 servings (2 small loaves) A recipe for Jewish rye bread - soft, plush and filled with caraway seeds.- 1½ tablespoons (1.5 tablespoons) active dry yeast
- 1½ cups (375 ml) warm water, 110 degrees F
- 2 cups (250 g) first clear flour
- 1½ cups (153 g) rye flour
- 1½ cups (354 g) Rye Sour Starter
- 1½ tablespoons (1.5 tablespoons) salt
- 2½ tablespoons (2.5 tablespoons) caraway seeds, optional, use more or less if you'd like
- In a large bowl, dissolve the yeast in the warm water. Let sit for 5 minutes, or until it starts to bubble and foam. Add the first clear flour, rye flour, rye sour starter, salt and caraway seeds. Stir with a wooden spoon until thoroughly incorporated.
- Turn the dough onto a well-floured work surface. Use a bowl scraper or dough cutter in one hand to help knead the soft, wet dough. Knead for 5 minutes by scraping, folding, pulling and stretching. The dough should have some elasticity and resist being stretched. Keep the dough soft, but if the dough does not feel elastic, add more first clear flour ¼ cup at a time, stretching and kneading with each addition. Continue kneading for another 3 minutes, keeping in mind that the wetter the dough, the better the bread. The amount of flour will vary depending on how stiff you made the rye sour starter.
- Transfer the dough to a clean, wet bowl. Keeping your hands wet, pat the dough down and cover with a thin film of water. Cover the bowl with plastic wrap and place in a warm spot, allowing the dough to rise until it has doubled in volume, 45 to 60 minutes.
- Prepare a baking sheet sprinkled with a mixture of cornmeal and rye flour (this is where the bread will be baked).
- Wet a clean work surface with water. Keeping your hands wet, scoop out half of the dough and shape into a round, handling the dough gently so it doesn't tear. Repeat with the second half of the dough. Allow the dough to stand no longer than 10 minutes; it can be placed in the oven without any standing time, and should not be proofed.
- Place an empty broiler pan on the oven floor and preheat at 375 degrees F for 5 minutes.
- Brush the loaves with water. Place the baking sheet holding the bread on the middle rack of the oven, or on an oven stone if you have one. Carefully add 6 to 8 ice cubes or 1 cup hot water to the broiler pan on the bottom of the oven and immediately close the oven door (be careful, as it will steam immediately).
- Bake for 5 minutes, then remove the broiler pan. Slide the bread out and, with a skewer, make 10 to 12 holes all around the crust of each loaf, then return the bread to the oven. Reduce the heat to 350 degrees F and continue baking for 10 minutes, then make holes once more and brush again with water.
- Continue to bake until the crust is hard and unyielding to gentle pressure, which can take up to 1 hour or longer (ours took about 50 minutes). The timing will vary depending on the amount of moisture in the dough. The bread is done when tapping on the bottom with your fingertips results in a hollow sound and the top and sides are hard. If you have a stone, you can transfer the bread to the stone at this point and continue baking for an additional 10 to 15 minutes if you prefer crustier loaves.
- Remove the bread from the oven, brush the tops with more water and let cool on a wire rack. The bread will keep for up to 1 week wrapped in plastic wrap, and also freezes well.
Notes
Notes:- First clear flour is a high-protein, high-mineral wheat flour that is used by many bakeries for signature Jewish-style rye bread. We purchased ours from King Arthur Flour.
- A possible substitute for first clear flour is 1½ cups all-purpose flour and ⅓ cup cake flour, but the cookbook author notes that the result won't be quite as good.
- The book recommends using white rye flour, which we also purchased from King Arthur Flour.
- Yield: 16 servings (2 small loaves)
- Prep: 30 minutes
- Cook: 1 hour
- Total: 1 hour 30 minutes
Ingredients
- 1½ tablespoons ( 1.5 tablespoons ) active dry yeast
- 1½ cups ( 375 ml ) warm water, 110 degrees F
- 2 cups ( 250 g ) first clear flour
- 1½ cups ( 153 g ) rye flour
- 1½ cups ( 354 g ) Rye Sour Starter
- 1½ tablespoons ( 1.5 tablespoons ) salt
- 2½ tablespoons ( 2.5 tablespoons ) caraway seeds, optional, use more or less if you'd like
Method
- In a large bowl, dissolve the yeast in the warm water. Let sit for 5 minutes, or until it starts to bubble and foam. Add the first clear flour, rye flour, rye sour starter, salt and caraway seeds. Stir with a wooden spoon until thoroughly incorporated.
- Turn the dough onto a well-floured work surface. Use a bowl scraper or dough cutter in one hand to help knead the soft, wet dough. Knead for 5 minutes by scraping, folding, pulling and stretching. The dough should have some elasticity and resist being stretched. Keep the dough soft, but if the dough does not feel elastic, add more first clear flour ¼ cup at a time, stretching and kneading with each addition. Continue kneading for another 3 minutes, keeping in mind that the wetter the dough, the better the bread. The amount of flour will vary depending on how stiff you made the rye sour starter.
- Transfer the dough to a clean, wet bowl. Keeping your hands wet, pat the dough down and cover with a thin film of water. Cover the bowl with plastic wrap and place in a warm spot, allowing the dough to rise until it has doubled in volume, 45 to 60 minutes.
- Prepare a baking sheet sprinkled with a mixture of cornmeal and rye flour (this is where the bread will be baked).
- Wet a clean work surface with water. Keeping your hands wet, scoop out half of the dough and shape into a round, handling the dough gently so it doesn't tear. Repeat with the second half of the dough. Allow the dough to stand no longer than 10 minutes; it can be placed in the oven without any standing time, and should not be proofed.
- Place an empty broiler pan on the oven floor and preheat at 375 degrees F for 5 minutes.
- Brush the loaves with water. Place the baking sheet holding the bread on the middle rack of the oven, or on an oven stone if you have one. Carefully add 6 to 8 ice cubes or 1 cup hot water to the broiler pan on the bottom of the oven and immediately close the oven door (be careful, as it will steam immediately).
- Bake for 5 minutes, then remove the broiler pan. Slide the bread out and, with a skewer, make 10 to 12 holes all around the crust of each loaf, then return the bread to the oven. Reduce the heat to 350 degrees F and continue baking for 10 minutes, then make holes once more and brush again with water.
- Continue to bake until the crust is hard and unyielding to gentle pressure, which can take up to 1 hour or longer (ours took about 50 minutes). The timing will vary depending on the amount of moisture in the dough. The bread is done when tapping on the bottom with your fingertips results in a hollow sound and the top and sides are hard. If you have a stone, you can transfer the bread to the stone at this point and continue baking for an additional 10 to 15 minutes if you prefer crustier loaves.
- Remove the bread from the oven, brush the tops with more water and let cool on a wire rack. The bread will keep for up to 1 week wrapped in plastic wrap, and also freezes well.
Notes
First clear flour is a high-protein, high-mineral wheat flour that is used by many bakeries for signature Jewish-style rye bread. We purchased ours from King Arthur Flour.
A possible substitute for first clear flour is 1½ cups all-purpose flour and ⅓ cup cake flour, but the cookbook author notes that the result won't be quite as good.
The book recommends using white rye flour, which we also purchased from King Arthur Flour.